Creating and Managing User Groups
Last updated 5 months ago
User group
This article describes how an Admin user can create and manage user groups. Additionally, it includes references to other valuable resources for efficient access management within the BI Book platform.
Create User Group
User group - Access to BI Book content can now be managed through user groups. You can assign a user group to BI Book content, and all members of that group will get the permission level defined by the User Group on the content.
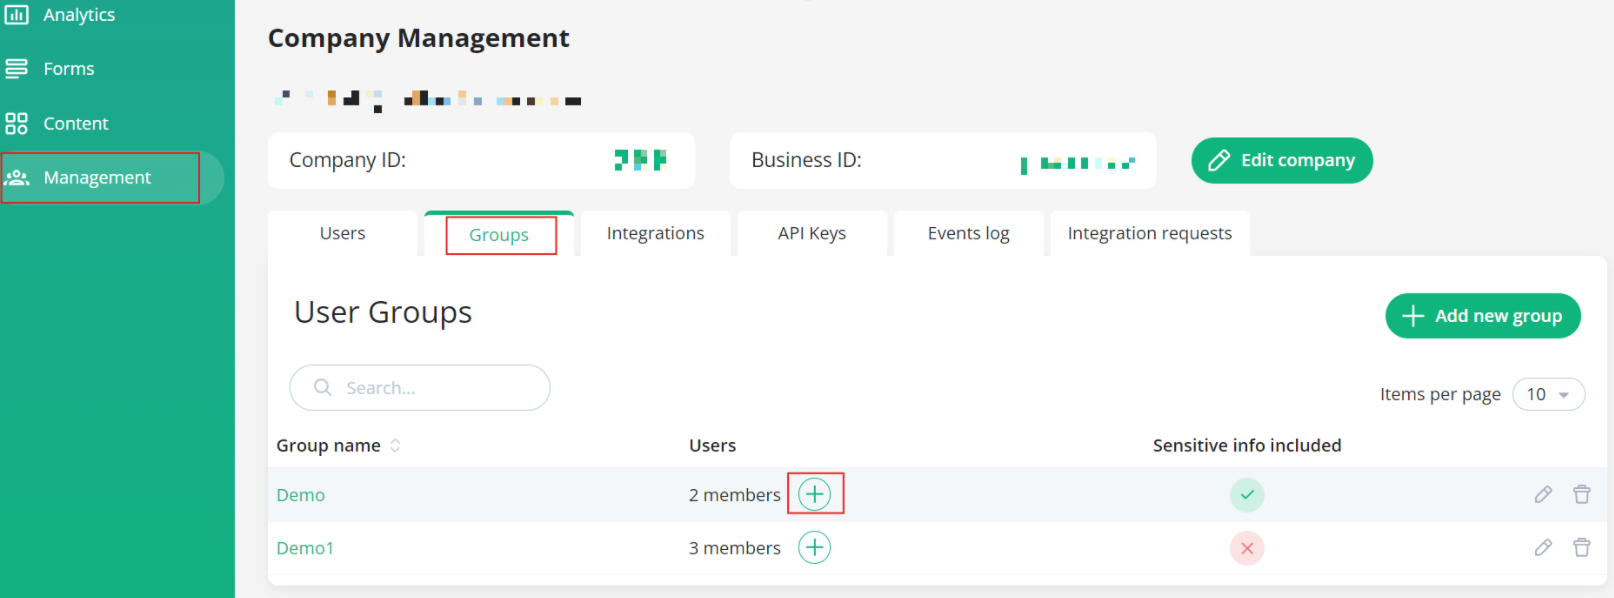
(1) Admin users can create and manage User Groups by navigating to BI Book Company portal → Management → Groups → pressing “Add new group” button:

(2) Fill in “Group name” field (better to have a descriptive name that would reflect the purpose of the group) → Select user(s) that should belong to this User Group → Check or leave unchecked “Sensitive info included” * → press “Create”

💡*Sensitive info included - the purpose of this setting is to mark a User Group that has privilege to access sensitive data, for example, payroll reporting, etc. Once checked, you will quickly see which user groups need extra care when adding users. This helps you avoid accidentally giving access to sensitive data through these groups.
Example of enabled "Sensitive info included" setting:
🟢In User group list view:

🟢In User Group view:

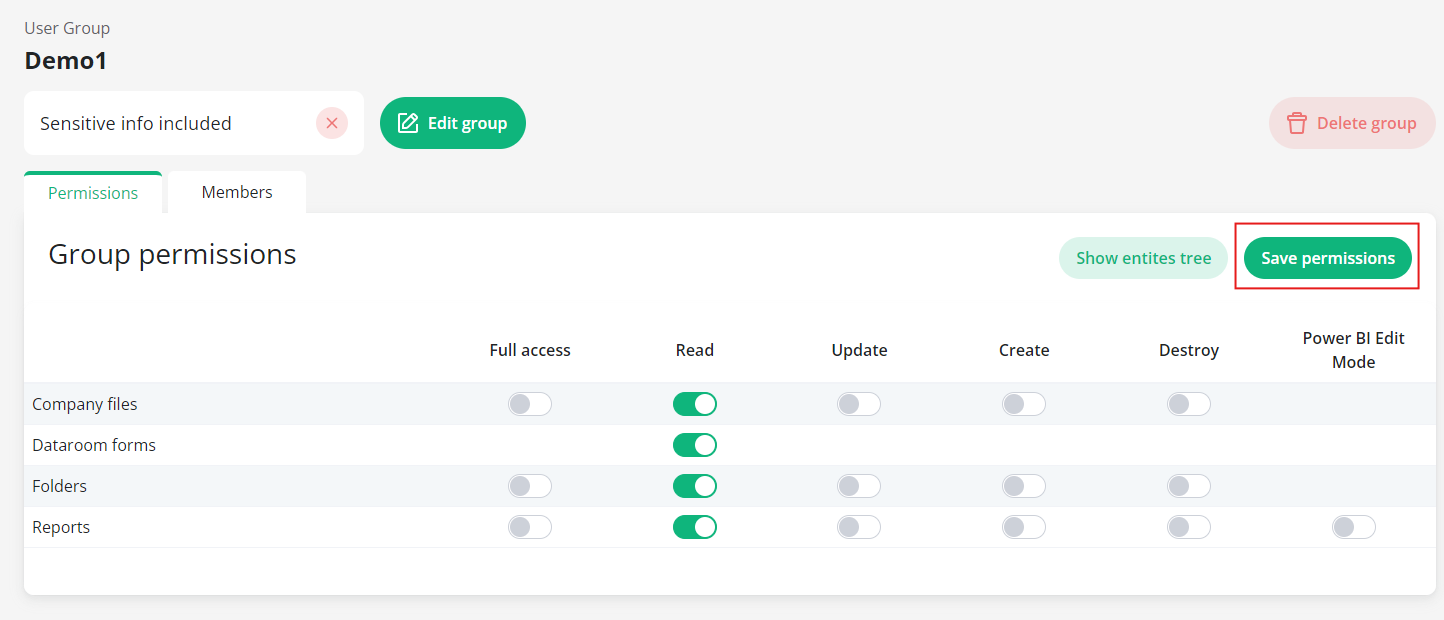
(3) Click on the user group name or the edit icon to configure the permissions (⚠️please check "Permissions for BI Book Content Objects" section at help.bibook.com/en/articles/bi-book-access-management for better understanding how the permissions work for different BI Book content objects) for the user group:

(4) Remember to press “Save permissions” before navigating to the “Members” tab or “Show entities tree”:
(5) You can add more users to the user group by navigating to the “Members” tab → Add user:

(6) Alternatively, you can add a user to the user group from Management → Groups → User Groups list view “+” icon next to the number of users:
💡User can belong to more than 1 User Group. In this case if there are overlapping permission to the same Content object, the higher permissions prevail.
Example Scenario - User belongs to 2 different User Groups:
🟢User Groups:
- User Group A: Read permission to Report C
- User Group B: Full access to Report C
🟢Outcome:
If a user belongs to both User Group A and User Group B, the user will have full access to Report C due to the higher permission level from User Group B.
(7) To learn how to grant a user group access to a BI Book Content object, please refer to the following resource: help.bibook.com/en/articles/granting-access-to-the-content-objects
(8) You can check what content objects a user group has access to from user group settings:
a. Management → Groups → edit <user-group-name> → “Show entities tree” button:

b. You can remove user group’s access to a content object from entities tree view by clicking on the delete icon:

Related articles
BI Book Access Management help.bibook.com/en/articles/bi-book-access-management
Granting access to the Content Objects http://help.bibook.com/en/articles/granting-access-to-the-content-objects