How to activate Netvisor HR integration
Last updated 2 months ago
Content
Netvisor HR integration activation
Activating Netvisor HR in a new BI Book environment
Activating Netvisor HR in an existing BI Book environment
💡Before getting started please check out the prerequisites to make the activation process smooth
Data endpoints required
If you are our existing Payroll/Accounting customer using Netvisor, we have automation available to get all the necessary data endpoints.
In all other cases, you will have top open these endpoints yourself. Please see Netvisor’s tutorial on how this can be done:
The list of required endpoints is as follows:
Activation flow
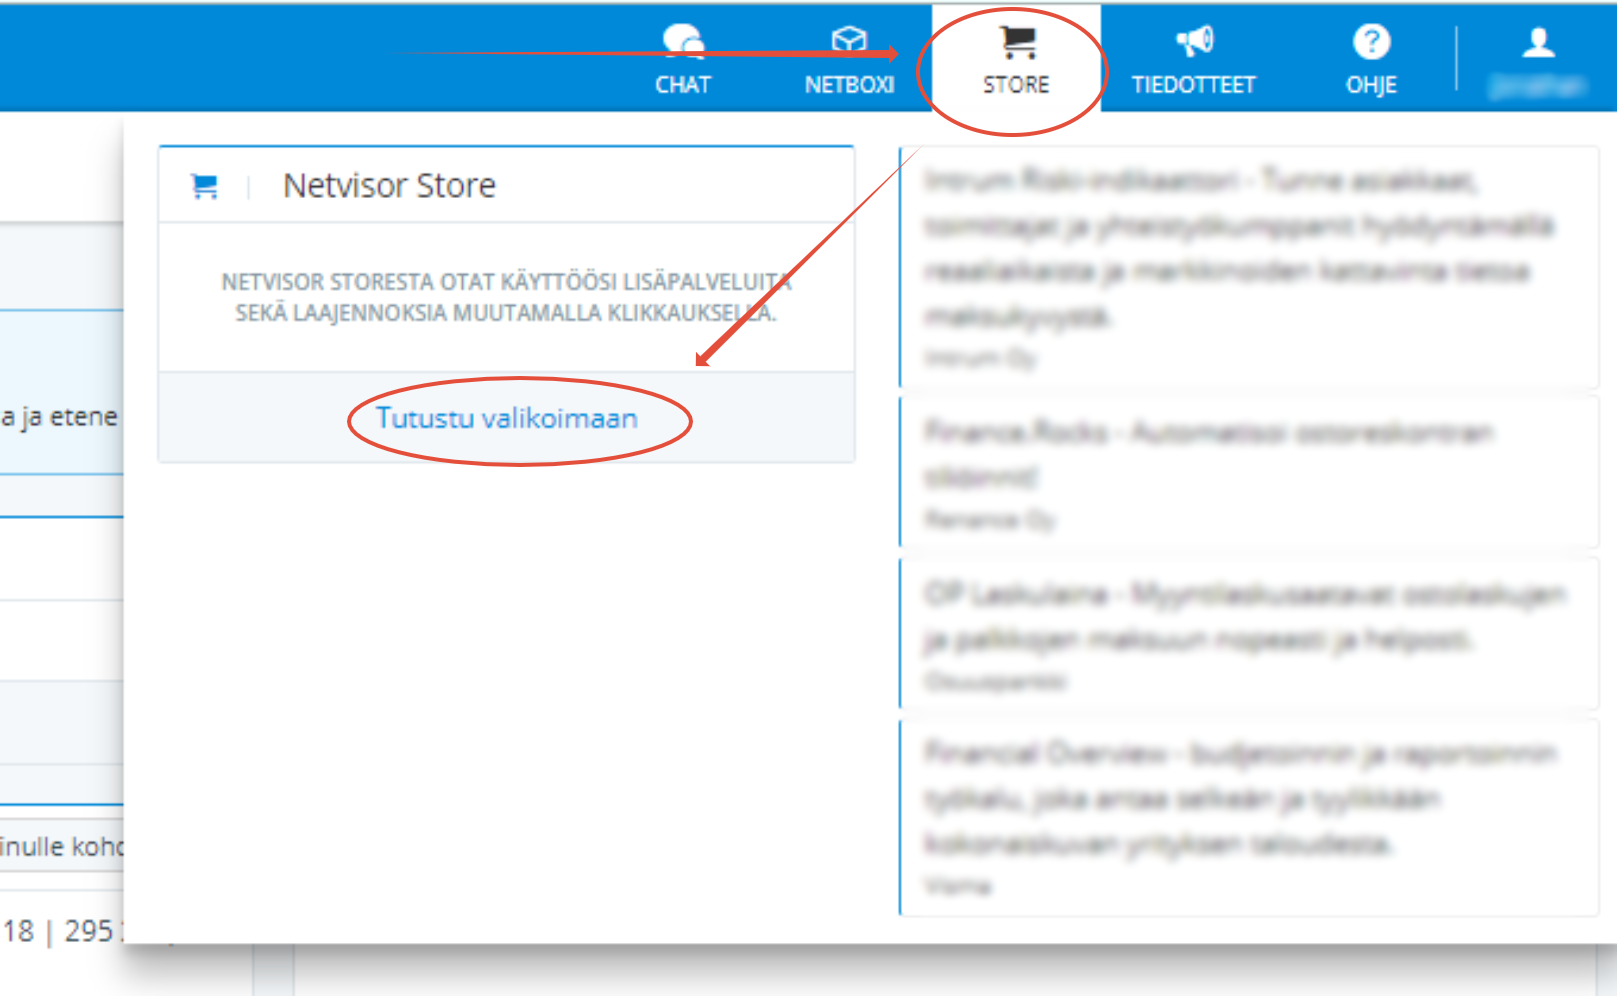
The activation process starts from the Netvisor Store.
Log in to Netvisor with a user with rights to use the Netvisor store. Usually, only your account Admins can do this.
Go to the Netvisor Store either by clicking this link or following steps 3-4: https://suomi.netvisor.fi/evo/admin/integrationmanagement/netvisorstore.aspx?
(If step 2 skipped) In your upper right corner, choose "Store" and "Browse the Selection."
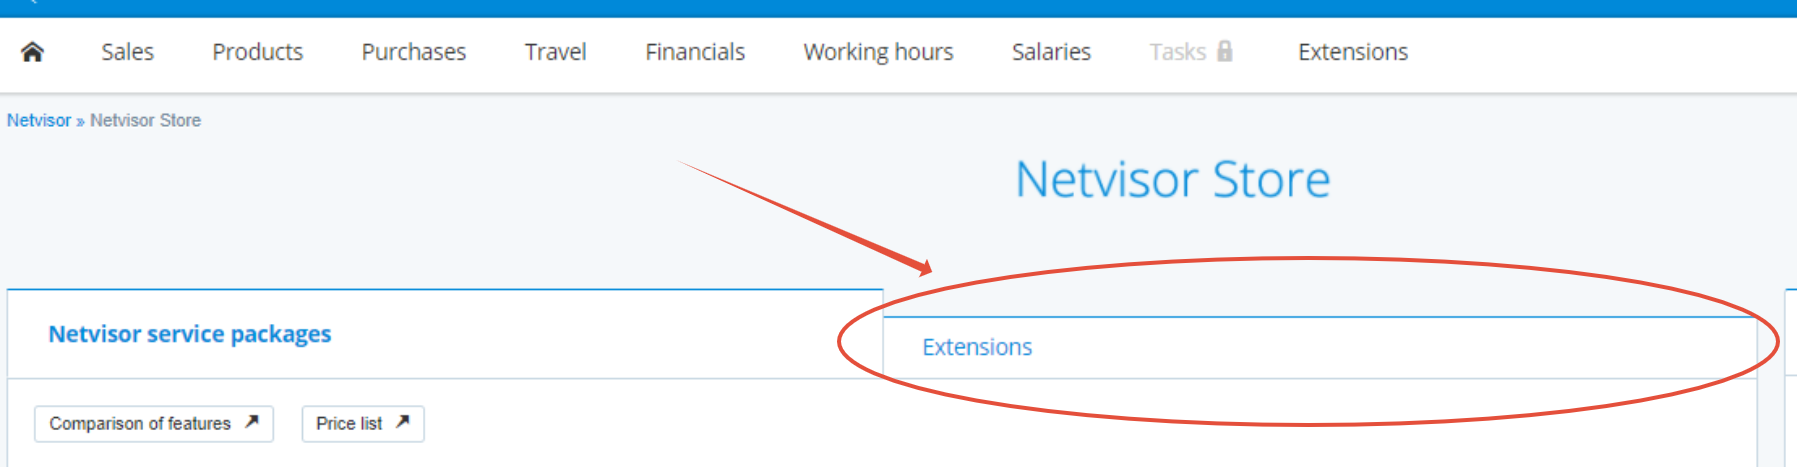
(If step 2 skipped) Choose "Extensions" (in finish "Laajennokset")
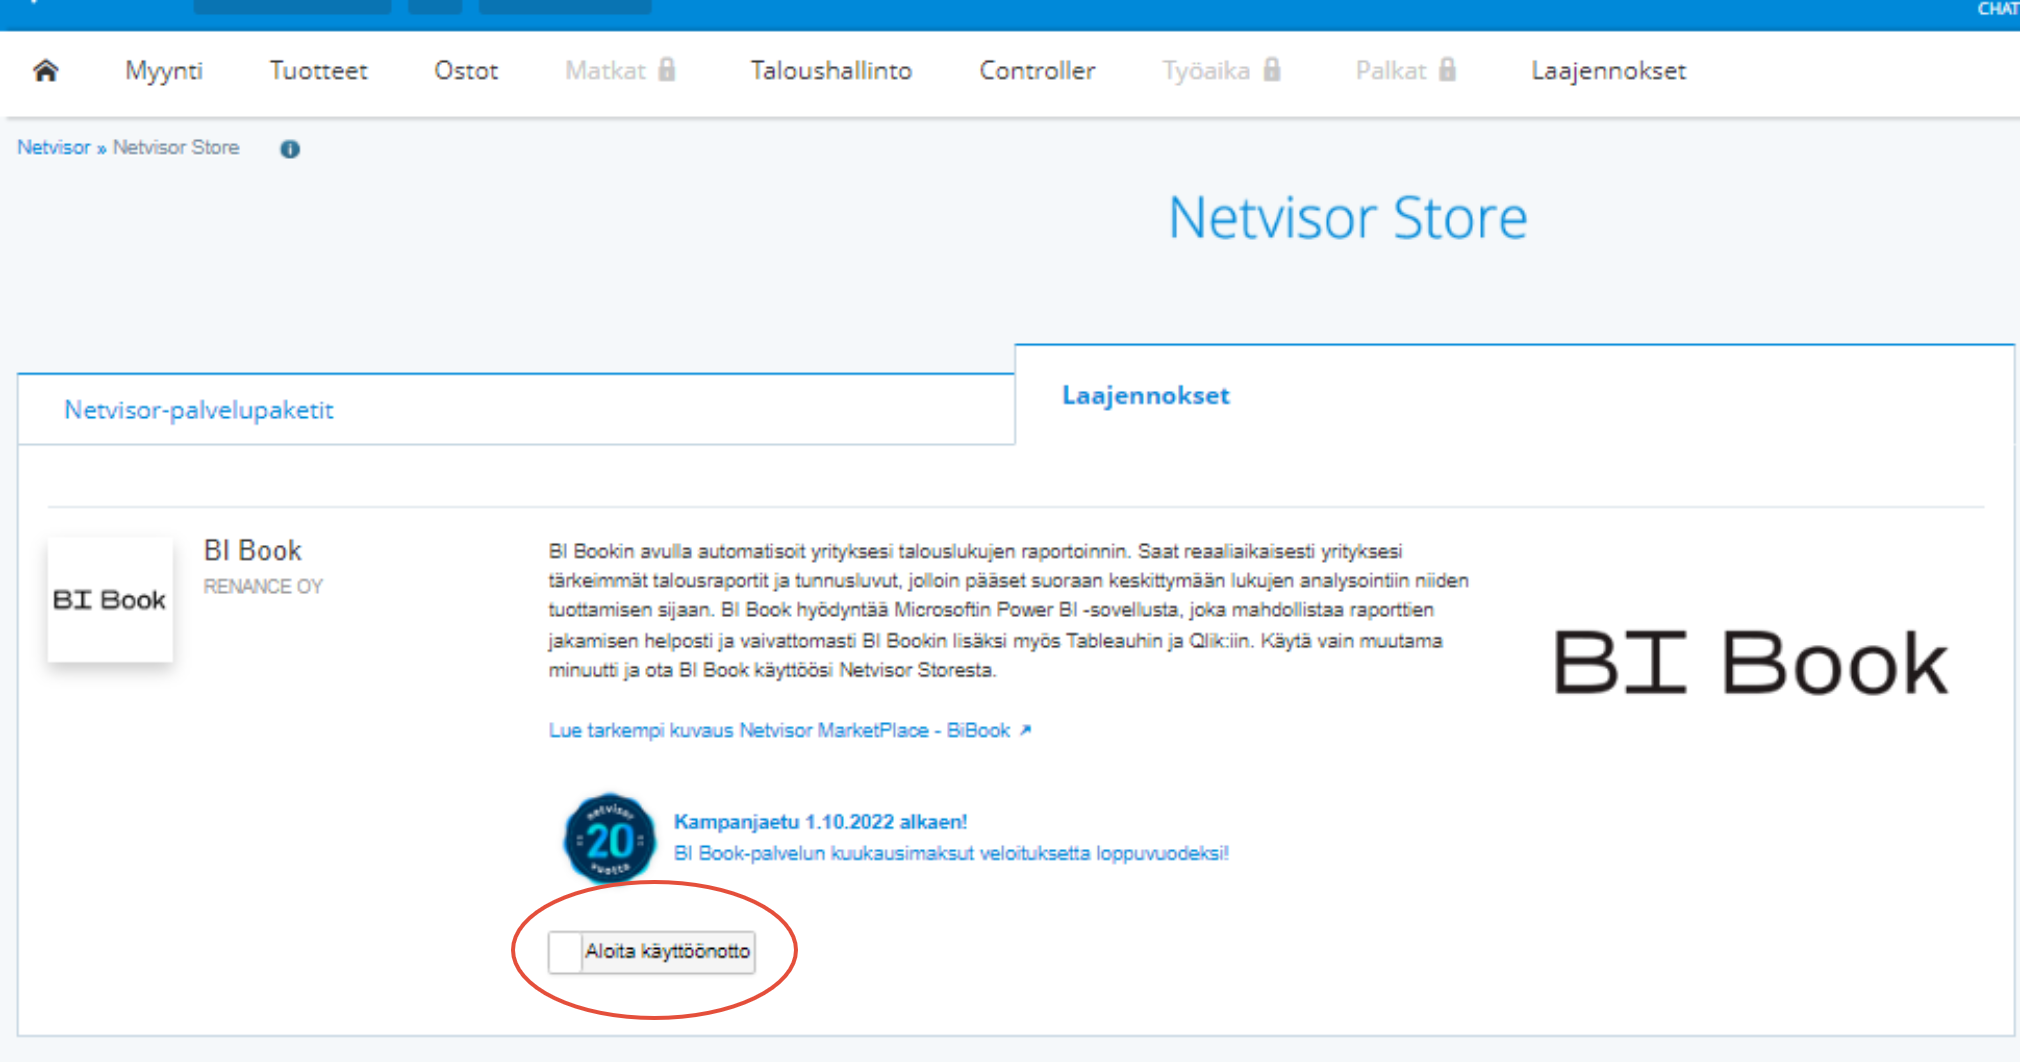
Scroll down to find BI Book Netvisor HR and click “Activate”
Press "Go to BI Book activation"
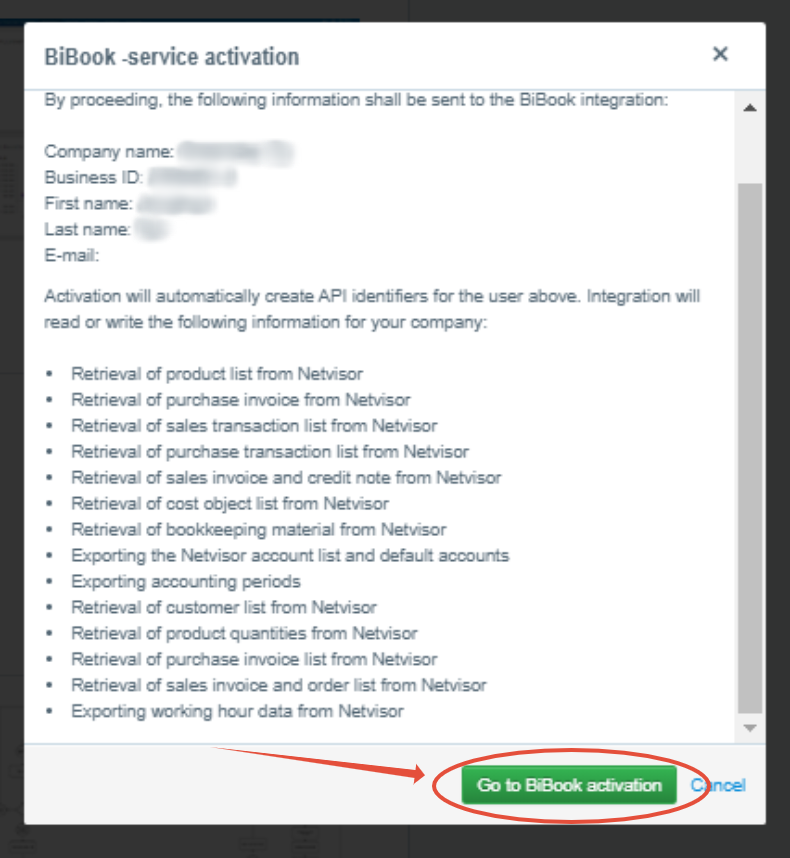
You will be redirected to https://bibook.com/no_have_company
After the redirect, the browser will ask you to login and authenticate the integration process. Log in according to the email service provider used by your company (Google or Microsoft authentication).
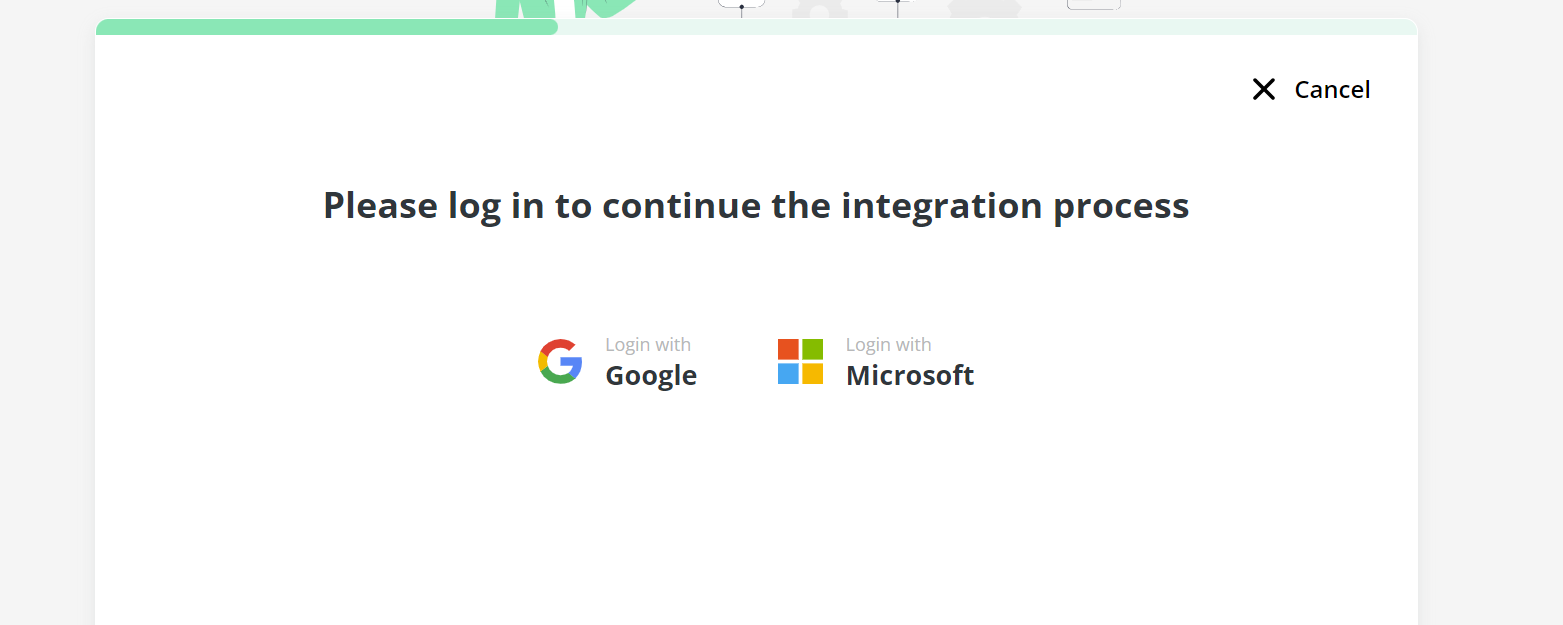
IMPORTANT! You must log in to activate the service. If you do not log in, the service will not be activated and you will need to restart the process.
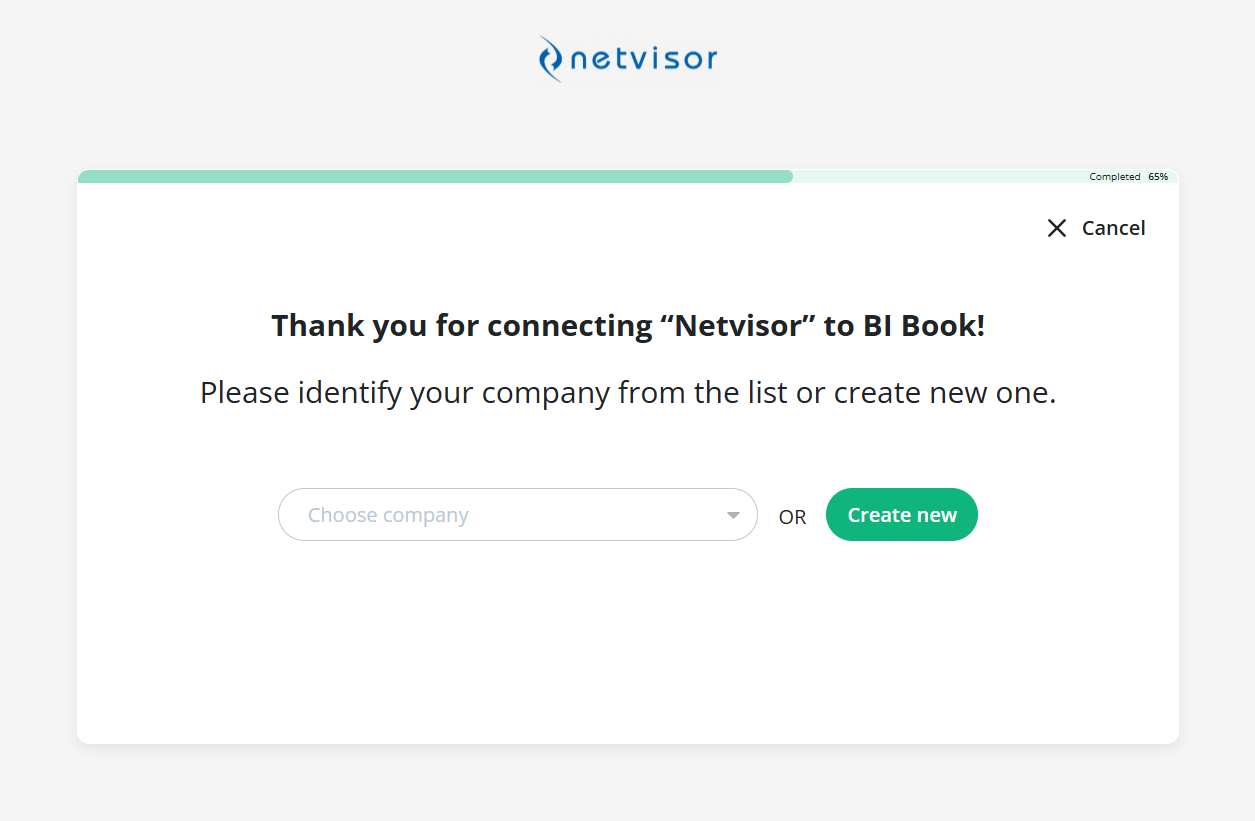
After logging in, if your email is linked to an existing BI Book environment that matches the company Business ID in Netvisor from which you started the activation, you can select that environment; if not, you can create a new one.
New BI Book Environment
After pressing “Create new” button:
"Company VAT ID" is automatically fetched from the Netvisor (fill in if not).
“Company name” - you can adjust the name if needed
"Company email" this can be the activator's email or your general organization email.
"Enter subdomain name" This is your desired subdomain, for example:
company-name-oy.
In this case, your BI Book address will be:company-name-oy.bibook.com.
✅Below subdomain field, you can read the terms and conditions and accept them.
⚠️Remember to press the green button that says "Create company"